Saturday, June 30, 2012

Quiet but Determined.

Do not underestimate the determination of a quiet [wo]man.  ~Iain Duncan Smith

Things have been pretty quiet this past week.  But, it's more a calm-before-the-storm type of quiet than anything.  My friend (and contractor), Glenn Tepe, is finishing up a job which will free his time to start working on the boat.  Also, Bruce (the person from whom I am buying the boat) is back in town and ready to finish the items left on the contract.  I have found someone to make the new fuel tanks for me, and he said he would get started right after July 4th.  I am meeting with John Toich to work on a contract for canvas and mesh (in orange).  John First is putting some finishing touches on the name and design to send off to be made in vinyl.  The new fenders and lines have arrived.  And I am hoping to buy paint today to re-coat her decks and paint the green stripes orange.

The orange mesh, made by Phifertex, will match the canvas perfectly.  It will go all the way around the bottom section of the deck rail (to aid the pups in learning boundaries on the boat).
 Is this necessary?  See for yourself:
Yes, he jumped in.  And he has attempted to jump in again.  They do have life jackets, but they don't love to hang out in them:

Getting the new fenders and lines in was VERY exciting! I have spent so much time researching fuel tanks, ordering window frames, light fixtures, stainless screws, urethane seam sealer, paint, etc., that ordering something truly boat-related was a very fun!
 
Lines: (http://softlinesinc.com/i-4982043-25-hunting-boat-launch-line-1-2.html)
Fenders:  (http://www.overtons.com/modperl/product/details.cgi?r=view&i=76748)

Since the lines have her name on them, I cannot put them on her until after the name-change ceremony.  I am so excited to get that planned.  As soon as she is painted and I have a date for the new vinyl name and design to be applied, I will set the date!

My friend and I did some research on the best paint to use for the decks.  I think I have settled on products by Amercoat (http://ppgamercoatus.ppgpmc.com/).  This company specializes in protective and marine coatings.

I am going to apply a base of Amerlock 2: Fast drying surface tolerant VOC compliant epoxy (http://ppgamercoatus.ppgpmc.com/products/pdf/2_PDS_AI.pdf).  This stuff sticks to everything and does not require pre-treating.  You have to mix two components.  Once I mix them, I will have about 45 minutes pot life.

The top coat will be Amershield: Aliphatic polyurethane coating (http://ppgamercoatus.ppgpmc.com/products/pdf/Amershield_PDS_AI.pdf).  It is high gloss, and also has a 2-part mix.  But with this one, there is about 1.5 hour pot life.  They will mix it to match the existing paint color.

The aluminum has to be 85 degrees or cooler to paint, so I bought this infrared tool to test the temp of the decks before I paint them (I wonder if I will ever find another use for this tool...):

I have the materials and tools I need to get started on painting the decks (now I just need a dry, coolish night):

I also spent some time photo-shopping the new orange stripes in place.  Here is the before and after.

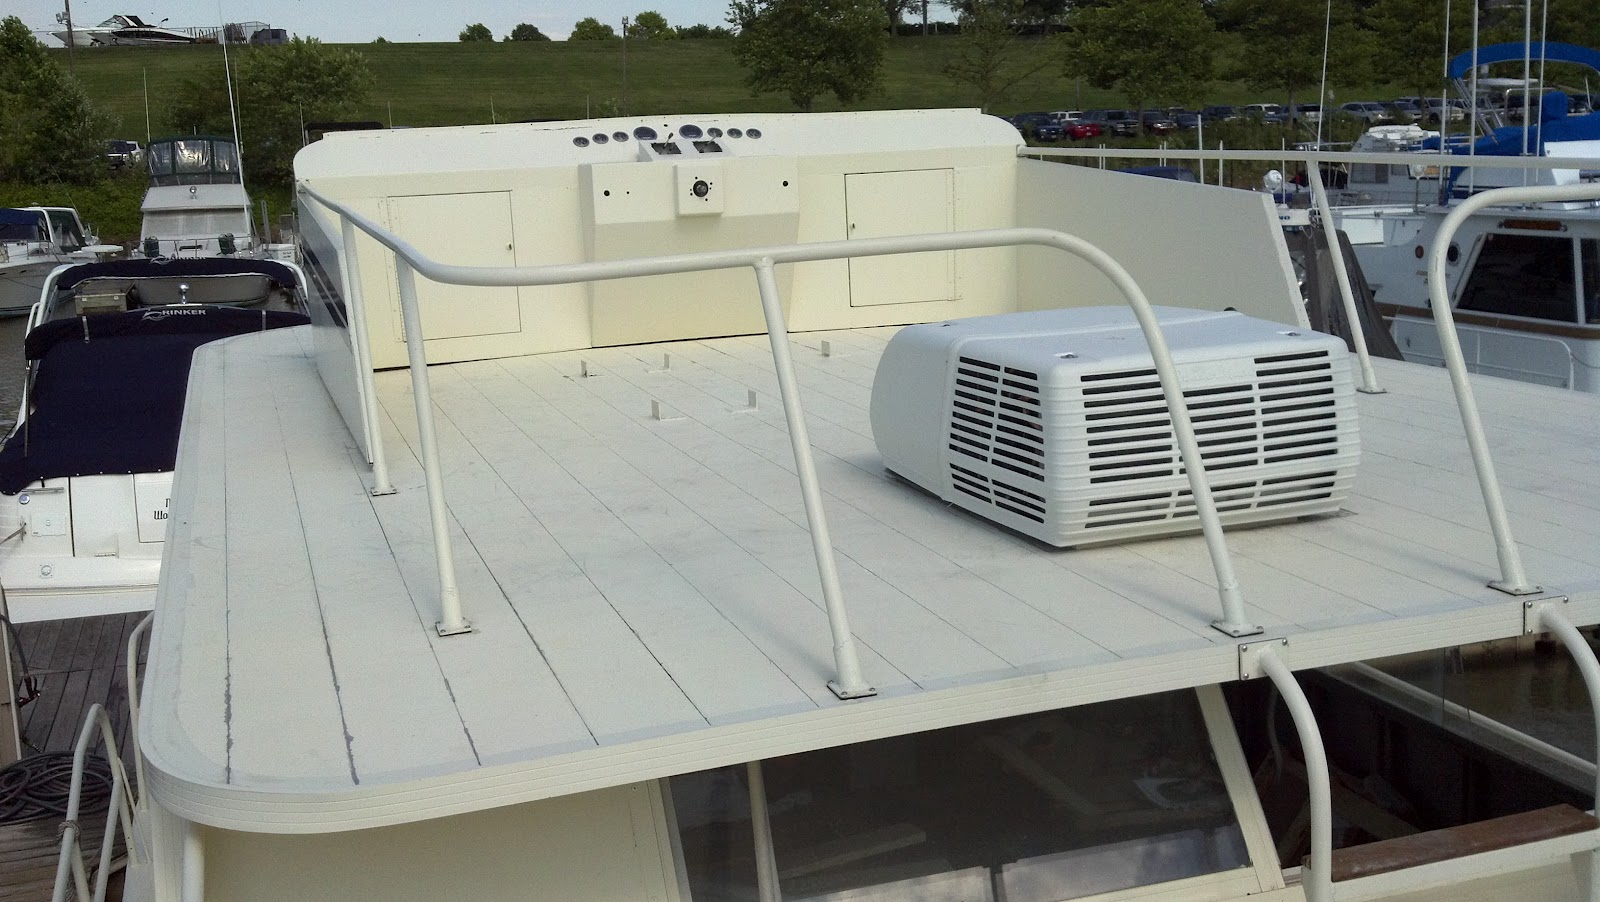
This pic shows her as she is now.  Notice how the stripes on the bridge are not parallel with the rest of the stripes?  I really think this ruins the flow, so I wanted to fix that.  I also wanted to paint the triangular area behind the porthole (so the lines are more connected and fluid).
So, here is what she'll look like painted orange:
I widened the orange stripe so that the bottom will be parallel with the other stripes.  I like this much better.  Her name will be placed on the front of the bridge and on the back of the boat.

I have four options for the graphics, and I think I know which one I will choose:

Which do you like best?

A lot of thought went into this name!  An Empress is "A woman who rules of her own right," and the Bennu is the Egyptian version of the Phoenix.  Power and rebirth--I think this suits her.

I'm excited to see what kind of progress is made in the next few weeks!

Tuesday, June 19, 2012

The Ledger of the Deep & Poseidon's Memory (preparing for change)

"The beginning of wisdom is to call things by their right names."  ~Chinese Proverb

My first blog post was titled, "A Priority."  My boat's current name is Nauta Priority.  For the last 10 years, at least, this has been a fitting name.  All of that has changed; she is a priority.  And so her name must change as well.

I have finally decided on her new name.  It is a name that signifies power and rebirth.  

Renaming a boat is tricky.  There is a long-held belief that renaming a boat is a very unlucky thing to do...unless done right.  By tradition, you must purge the name from the Ledger of the Deep and from Poseidon's memory, and add the new name.   

This will require a boat renaming ceremony.  Here is a link to one version of this ceremony:  http://boatsafe.com/nauticalknowhow/rename.htm.  Good news: Plenty of champagne is required.

I think this is a great reason to have a party.  More information on this will be coming soon--but if you are reading this, if you have ever had a boat, if you have ever been part of positive change, if you like to have fun...I hope you will attend!  Help me make this the largest renaming ceremony in the history of Four Seasons Marina!

In preparation of a party in her honor, I'd like to have her new look to go along with her new name.  
 
Signs Now gave me a quote on covering the green stripes with orange vinyl and putting her new name and a graphic on the front and back.  They also sent me a pic of the boat with orange (my orange will not be this bright):
I think I will probably re-paint the stripes myself (with a little help from friends), and have Signs Now (http://www.signsnow.com/) do the name and graphics for me.  They have been amazing to work with so far!

I also ordered new lines (ropes) and new fenders...in orange!  

The lines will be personalized with her name.  I ordered from this website:  http://softlinesinc.com/c-95139-boats.html.  The fenders came from this website:  http://www.overtons.com/modperl/product/details.cgi?r=view&i=76748.

Today we re-sealed the seams on the rest of the top deck, which is also the ceiling of the front deck (same process I described in my last post).  When I washed the boat...not one leak!  How rewarding!  Now I just have to do this to the front deck and a few other seams, then two fresh coats of paint.
 
 
 I used some 2 x 4s to support the deck while we crawled around on it:
I am hoping the new window frames will be installed this Wednesday and Friday.  Fingers crossed!

Today someone came aboard to take some measurements.  As he looked around, he shook his head and pointed out that I had taken on a huge amount of work.  Perhaps, but I choose to look at each task separately.  I have taken on lots of steps, and I am taking them all one at a time.  It took years of her being "Nauta Priority" to result in disintegration.  Her rebirth will require energy, money, dedication and time (but less time than her disintegration). 

I am willing to give that.  She is becoming "one who rules in her own right"..."one who is reborn."  And soon she will be called by her right name.   


Tuesday, June 12, 2012

Sealing Seams: Fixing leaks in the deck and ceiling.

Friday, June 8 - Sunday, June 10, 2012

I can't tell you how important it is to ask questions and push for certainty.  When I first looked at the boat, there was a lot of very obvious water damage.  She had been sitting in the slip for years with little to no attention...and aluminum boats sweat (just like a beer can).  While I was told that the water damage was due only to condensation, it paid off to explore this and push through to certainty.

Once the boat was gutted, all it took was to stand inside the boat during a storm to pinpoint the leaks (the challenge is that there seems to be lots of them).  We determined that the 6 inch wide aluminum beams which make up the bridge (and the ceiling of the salon), the roof over the front deck and the floor of the front deck needed to be re-sealed.  The big question: "what is the best way to do that?"  There are as many opinions as there are people to ask.

I decided that I would just get Rhino-lining applied, and be done with it forever.  I called to ask about the process, and I learned that the chemicals used are extremely toxic when wet.  This process can only be done on their property, inside a large garage.  Well, since I have never heard the engines on the boat, this presented a problem.  It is also $18.50 per square foot, so for a boat the size of mine with many levels of decking and catwalks, this would be very expensive (I still may consider it at some time in the future).

The person I spoke with on the phone had another idea for me...which is what we ended up doing.

First task on my list was to get the tools needed for the job.  When I went to buy urethane seam sealer, the clerk picked out a tube for me.  It said "seam sealer" on the label, but it did not specify anywhere on the bottle that it was urethane.  I asked the clerk if it was, and he replied in the positive.  I pushed a little and asked how he knew it was.  He read the label, made a phone call, then said, "actually, this is not urethane."  He had to get the urethane seam sealer from the warehouse.  Once more, it paid off to ask.

Also, this job had the very happy side effect of giving me an excuse to buy a Dremel:
I started off trying to score each seam with the yellow utility knife, then I was going to use the Dremel to sand the seams.  I took a Friday off work to get started, and thankfully, my friend Gregg met me for lunch.  By lunchtime, I was miserable.  It was very tough getting through the layers of paint and old sealer with the utility knife, and after all the work I was doing, I did not feel confident that I was getting it done thoroughly enough (not to mention that it was 95 degrees and I was working in direct sun).  I explained all of this to Gregg, and he offered to take a few extra minutes to come to the boat and problem-solve with me.

When he saw what I was doing, he recommended I wait until I could borrow a tool he had with a very thin wheel that would get down into each seam.  I held up a wheel attachment that I had for the Dremel and we gave it a try.  It worked perfectly!  I used the metal cutting wheel and ran it straight through every seam.  It cleaned the old paint and old sealer out and left clean, exposed metal:
It took 3 of the Metal cutting wheels to complete the job!  Since I had only one, this provided a perfect reason to quit for the night.  But, it was fun, and I was so thankful for Gregg's idea!  On Saturday, I was back at it.
I was also thankful for Melanie's knee pads.  I can't imagine how sore my knees would have been without them!
 It took about 14 hours, but finally all of the seams were sanded:
 Next, I washed the seams with soap and water: 
 
After washing the bridge, I went down to the salon to see if the leaking had increased (demonstrating that the seals were the source of the leaks), and the leaking had drastically increased!  Strange to be happy to see your boat leak, but I knew this meant that the seams were the source and that I had gotten a lot of the paint and old sealer out:

Now I needed to clean each seam with a solvent approved for use with this type of seam sealer.  Another area in which I had to ask lots of questions to get the right chemical:
The next part of this job was very tedious.  Gregg helped me apply the urethane seam sealer.  He applied the sealer, and I smoothed it out with my finger.  This stuff is sticky and not fun to work with.  I have to admit that I was a bit grouchy throughout this part of the job--again, it was over 90 degrees--(and Gregg was very patient):
Finally, we were finished with this part of the project (in time for rain on Monday).  Now, I have to do this all over again on the ceiling of the front deck and floor of the front deck.  At least I'm experienced!
And, did you notice the new air conditioners?  Here are the old:
And the new (with the old sitting next to them):
Happy to see the old, ugly air conditioners going away:

I think I am close to getting a quote on covering the green stripes with orange (2 out of 3 places that I called recommended I paint them).  I should know what the 3rd place says soon, but it sounds promising.  If they can do it, they will also add her new name (name change ceremony may be soon)!

The orange mesh may be added soon, too.  I am very excited to see her new colors, and I'm keeping my fingers crossed that it happens soon!

"Orange is the happiest color."  ~Frank Sinatra


Monday, June 4, 2012

Inspiration (and a peek into the future)...

"A journey of a thousand miles begins with a single step."  ~Lao Tzu

June 3, 2012

I thought I might bring out the crystal ball and take a peek at what she will look like some day.  This is the general look I plan to achieve:
The floor will be mahogany rather than the teak and holly floor of this pic.  The walls, cabinets and furniture will all be light (beech or birch) wood.  The ceiling will look very similar to the one in the pic, with beams that are stained mahogany to match the floor, and panels that match the walls, cabinets, furniture, etc.

I wanted black granite counters, but they are too heavy for an aluminum boat, so I am looking for something similar in black that is not as heavy.

On the outside, I plan to paint the dark green stripes orange (yes, orange).  I looked at a houseboat with orange trim, and I really loved the color.  For just a bit, I considered blue, but a friend brought to my attention that the majority of the boats in the marina are blue.  And anyway, what better color for a boat of mine than orange? 

In case you are having a tough time picturing a houseboat with orange trim, here are some pics of the one I looked at:
I will get a new Bimini top in orange canvas, and orange mesh that goes around the railings.  The mesh will add some color, and also serve the very important purpose of helping the pups learn boundaries (and not go sliding into the river)!  Here are some boats with mesh on the railings--the orange mesh would be similar to this:

 
On my boat, the mesh will only be on the bottom half of the bottom railings.  I may add the mesh to the other two decks next year:

Here are some canvas colors (I like both shades, and I'm trying to decide if I can incorporate both without looking too colorful--but if not, I will probably go with the darker shade):
I have also found orange lines and fenders, so she will be a very color coordinated vessel!

~~~~~~~Enough dreaming about what will be, let's look at what has been done.~~~~~~~

Back to reality...we finally bolted down the bridge and reconnected the railings and stair for the upper deck.  When she was painted 4 or 5 years ago, the bridge was removed to get her into the building for painting.  All of her hardware was also removed, and none of it was ever put back in place.  

When putting the railings back in place, making it watertight was imperative.  To do that, we bought a sheet of gasket material, and cut the gasket to match the size and shape of the feet of the railings.  We then put some 5200 in each screw hole, put the gasket in place and screwed the railing in place:
Once the railings were all in place, I went around with a razor knife and cut all excess gasket from around the railing feet.
In this pic, you can see the railing in place, with excess gasket sticking out:
 And here it is after I trimmed the excess:

And finally the bridge is bolted in place and the railings and stair are in place:
 
The next two things I plan to conquer are:
  1. Finishing the engine compartment (I want to have this finished before Bruce starts working on the engine and puts the generator back in).  The steps I plan to complete:
    • Cover the carburetor to protect it from chemicals and water,
    • Spray the engines with Simple Green and let it sit for ~5 minutes,
    • Spray the engines with water on the 'jet' setting to remove grease, grime and debris,
    • Paint the parts of the engine that I am able to paint (black),
    • Paint the floor of the engine compartment with something shiny and gray!
    • I WANT A 'WOW' ENGINE COMPARTMENT!
  2. Sealing the seams in the top deck (bridge) of the boat.  The top deck is made of interlocking, 6 inch aluminum beams.  There is some leaking at the seams of the beams.  Steps I plan to complete:
    • Score the seams of the deck with a razor knife,
    • Sandpaper the seams just a bit to scuff them,
    • Put a bead of automotive urethane seam sealant down the length of each seam,
    • Use a pre-cleaner to run down the bead of sealant to smooth it out,
    • Let it cure for 3-4 days.
    • Eventually, I will roll on another layer or two of the deck paint.
I am also hopeful that my new air conditioners and window tracks will be installed this week.  Fingers crossed!
It is nice to dream of what she will look like--it reminds me what we are working toward. 

In the meantime, I will keep taking each single step toward that goal.